NFSU2 Dyno Tuning Guide: How I Build Track Weapons in Need for Speed Underground 2
Booting up Need for Speed: Underground 2 again hits like a fresh bottle of nitrous. Cruising through City Core under neon billboards while the soundtrack kicks in brings the 2000s import tuner scene right back. But once you install your widebody kit, carbon fiber hood, and Level 3 performance packs, buying upgrades only gets you halfway there. The real speed is locked inside the performance dyno shop.
Most players never touch the dyno sliders, which is why their cars plow into freeway walls or bog down off the starting line. I spent hours testing on the rollers and ripping laps around the dyno test track to work out how the physics engine behaves. If you want your ride to smoke hard AI and crush lap records, here is my hands-on tuning guide for every race mode in Bayview.
Want to see these ideas in real setups? Browse the community dyno tunes for slider-by-slider settings on every car.
Suspension
Dialing in your chassis makes the difference between a car that carves corners and one that feels like a runaway shopping cart.
Stance and Positive Rake
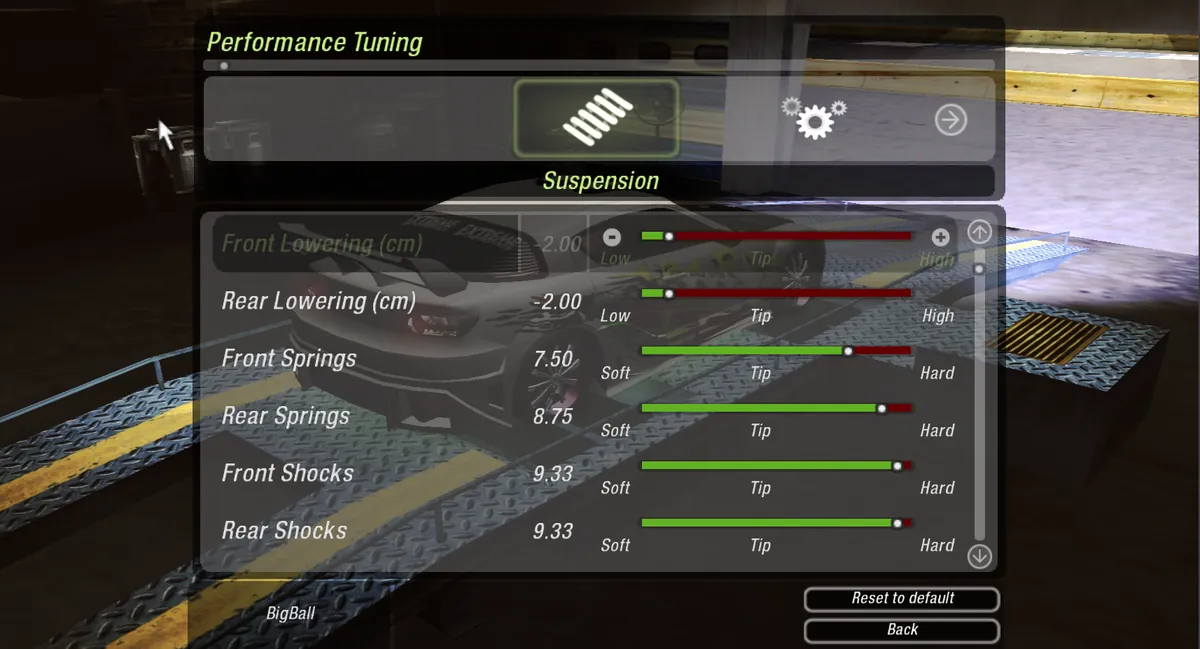
Slamming your ride to the floor looks clean at car meets, but dropping both axles to the absolute minimum causes the chassis to bottom out over bumps and curbs.
My baseline setup is positive rake: I slam the front ride height to the lowest setting, then raise the rear by 2 to 5 ticks. This forward rake tilts weight onto your front tires, giving you sharper turn-in response while keeping the rear end from spinning out on corner exit.
Springs, Shocks, and Sway Bars
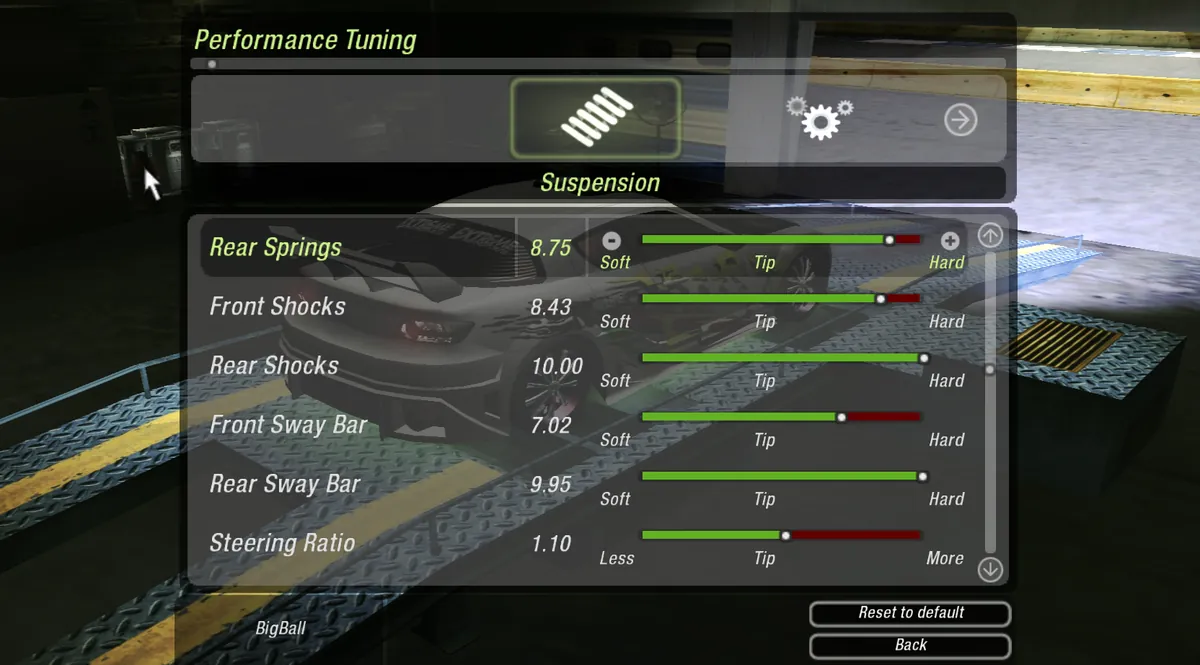
- Springs: Keep your front springs slightly softer than the rear. This lets the front end dive under braking, loading up the front tires for extra grip. Stiff rear springs keep the tail planted when you get back on the gas.
- Shocks: Set your rear shocks to maximum (10.0) and keep the front shocks firm (8.5 to 9.5). Firm damping stops the chassis from bouncing over highway crests and settles the car instantly after big jumps.
- Sway Bars: Soften the front sway bar and stiffen the rear sway bar to eliminate power-on understeer.
Drivetrain
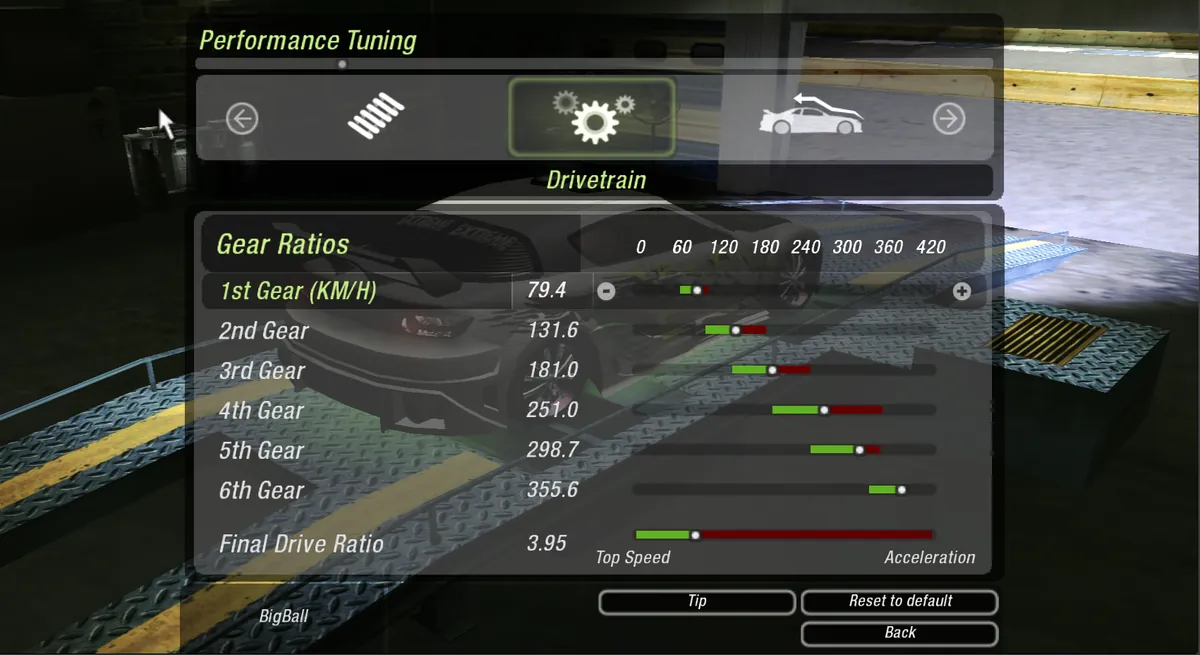
Gearing depends on the event, so the exact numbers are in the race-mode setups below. The rules I build from: set your final drive around 3.55 for high-speed highway sprints, up to 4.10 for tight downtown loops, and 4.40 to 4.50 for Street X. Adjust your individual gears so that every upshift drops the engine right to 6,000 RPM, keeping you in full boost. For drag, lengthen first gear so it pulls cleanly to 55 or 60 mph before you shift.
Aerodynamics
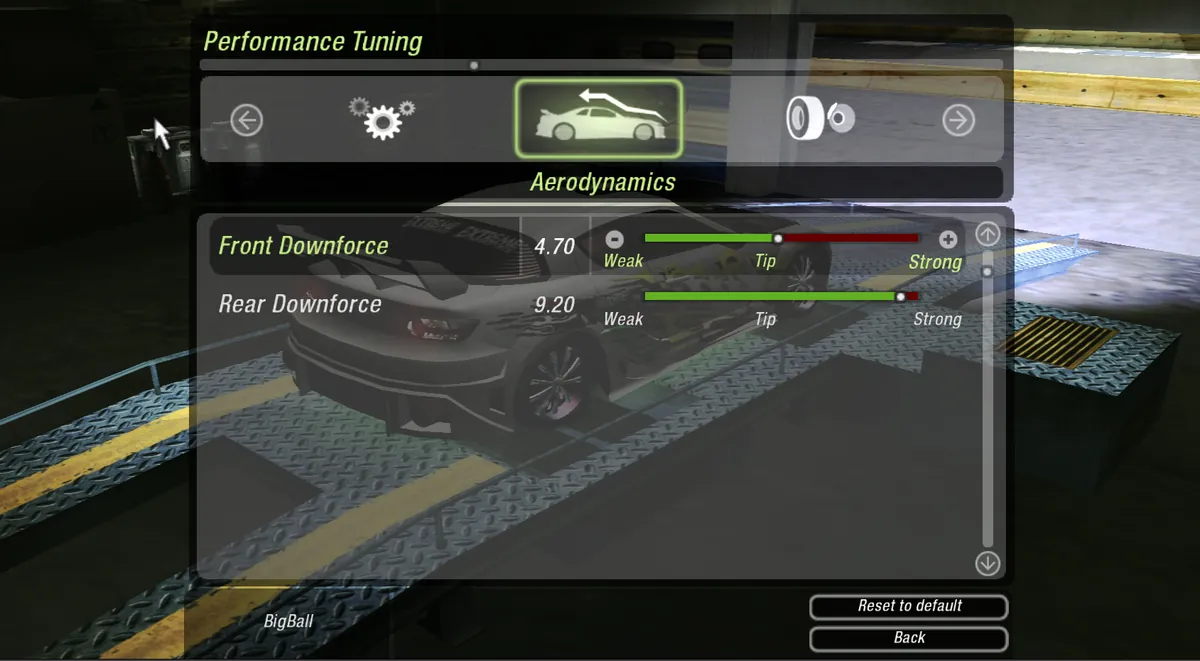
Install Level 3 bumpers and a rear spoiler so you can tune your aerodynamics. While you want maximum front downforce to keep the steering planted at high speeds, do not max out your rear wing.
Pushing rear downforce to 10.0 causes heavy understeer past 140 mph. Keep your rear downforce between 7.0 and 8.5 so you can turn through high-speed sweepers without scrubbing momentum.
Tires and Brakes
Tire grip sliders matter most for drift events, where I drop front and rear grip down to 0 or 2 (see the drift setup below).
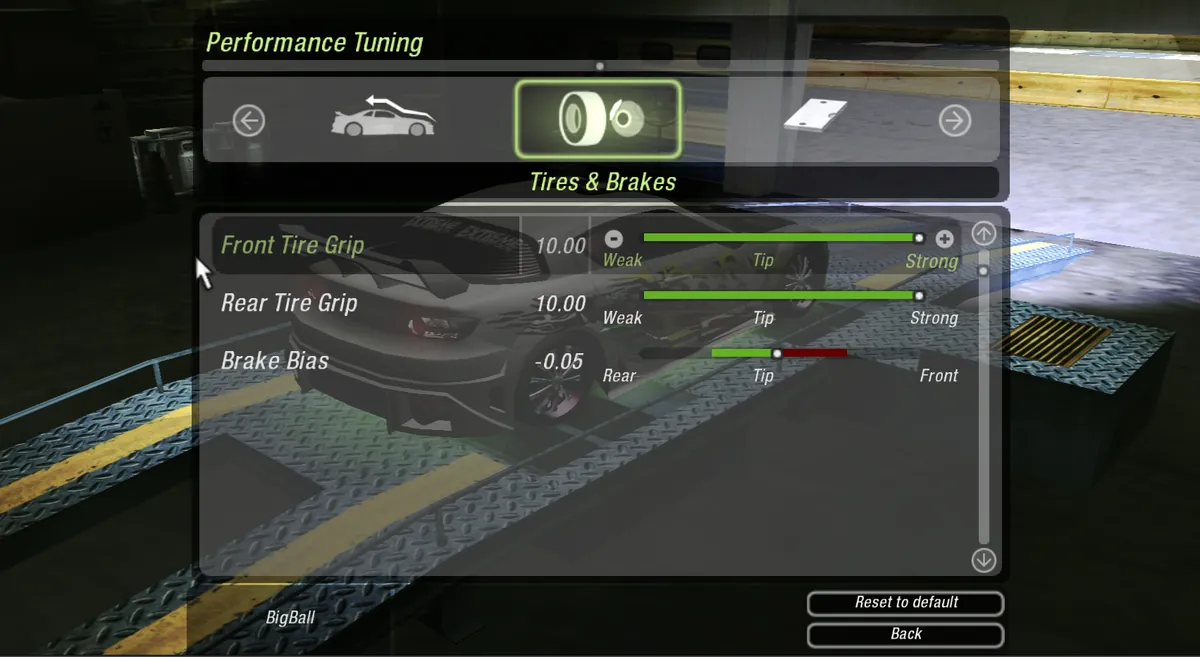
The Inverted Brake Bias Slider
The brake bias slider in NFSU2 is reversed. If you push the slider to positive values, thinking you are adding front brake force, you lock the front wheels instantly and push straight off the track.
I always set brake bias into negative numbers, usually between -0.05 and -0.15. This gives you true trail-braking control, allowing the rear end to rotate slightly into tight corners without unsettling the car.
ECU
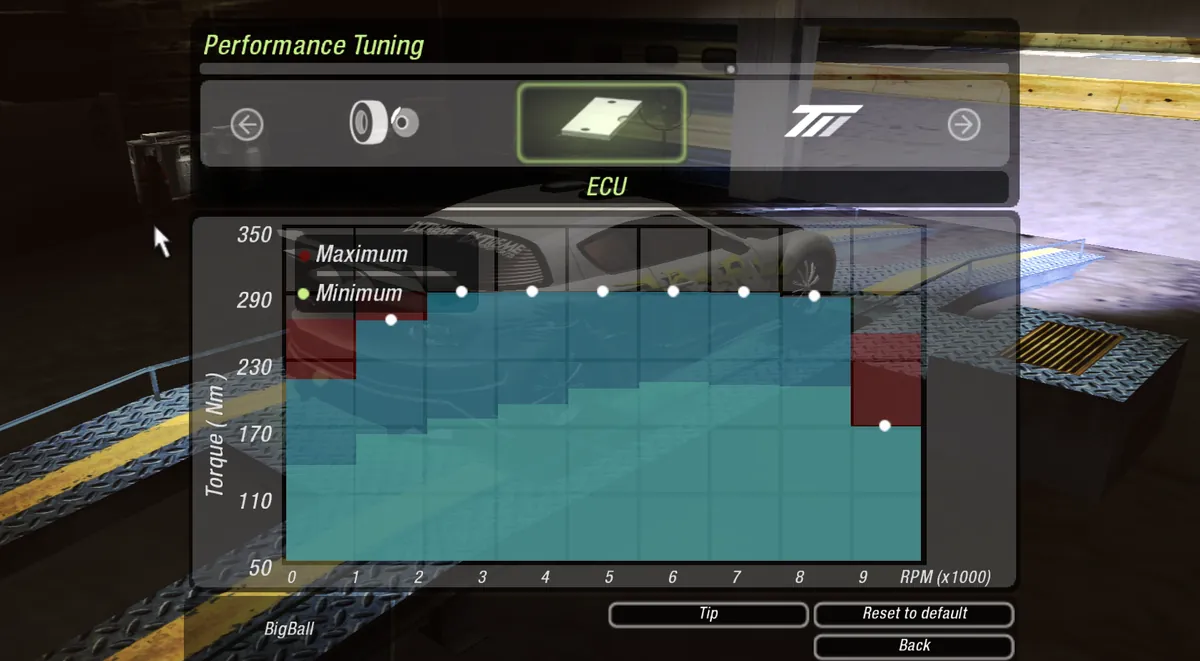
The stock tune in NFSU2 spreads fuel delivery and boost pressure across all nine RPM notches on the dyno screen. That might sound balanced, but in a real race, you almost never drop below 5,000 RPM unless you crash into a concrete divider.
When I tune an engine for circuits or sprints, I drag the first three or four low-RPM slider bars completely down to zero. Then, I max out the top bands from 5,000 RPM up to the redline.
NFSU2 treats engine tuning like a pool of points: pulling fuel and boost away from idle revs moves that power to the top end. The result is 25 to 45 extra horsepower right where your tachometer needle lives during a race.
Turbo
The turbo screen uses the same nine RPM notches, and I remap it the same way as the ECU: pull boost out of the first three or four low-RPM bars and max out the bands from 5,000 RPM up to the redline. The exception is drift, where both the ECU and turbo focus move into the mid-range (between 2,500 and 5,500 RPM).
Nitrous
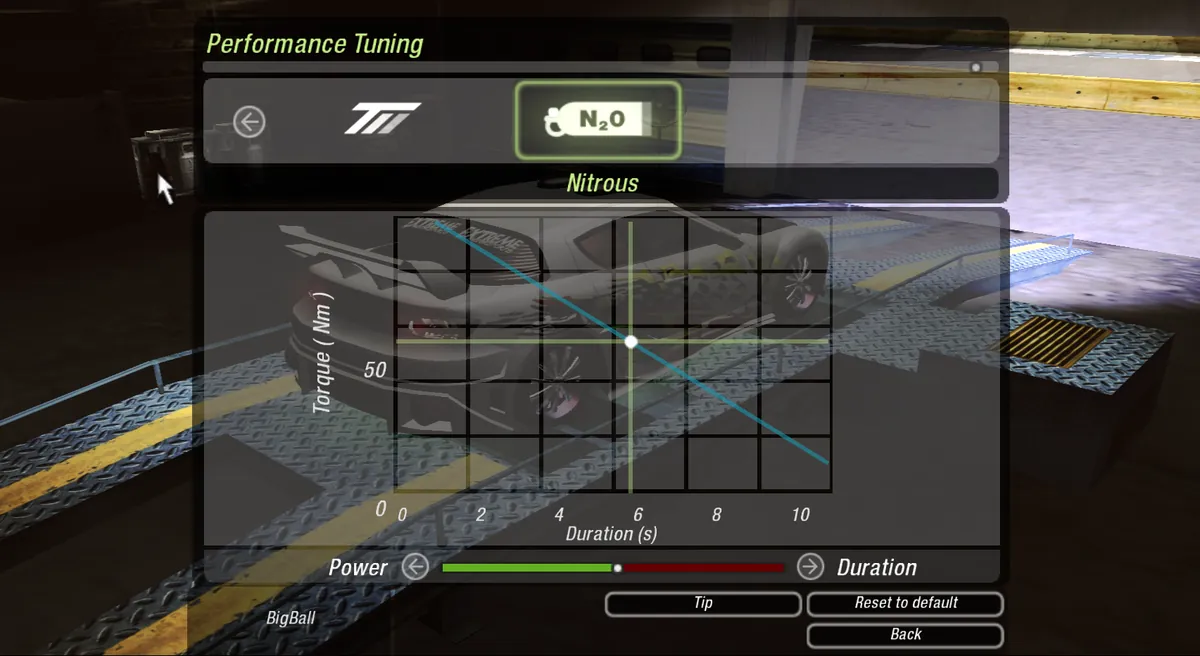
Never move your nitrous slider toward duration. A weak ten-second hiss will not pull you out of hairpins. I always set nitrous flow toward velocity, dialing the total boost time down to 3.5 or 4 seconds. That concentrated hit of torque lets you blast off the line or overtake an opponent on the final straight.
Discipline-Specific Tuning Setups
1. Circuit, Sprint, and URL Racing
Sprint events share their setup file with Circuit mode, so your adjustments carry over directly. These tracks demand high stability, sharp turn-in, and quick gear recovery.
- Gearing: Set your final drive around 3.55 for high-speed highway sprints or up to 4.10 for tight downtown loops. Adjust your individual gears so that every upshift drops the engine right to 6,000 RPM, keeping you in full boost.
- Chassis: Run positive rake (slammed front, slightly raised rear), a firm rear shock setup, and -0.08 brake bias.
- Downforce: Front downforce at 10.0, rear downforce at 8.0.
2. Drag Racing on Bayview Bridge
Drag mode requires maximum launch traction, fast gear shifts, and zero wheelspin.
- Gearing: Never run short gearing in drag events. Lengthen first gear so it pulls cleanly to 55 or 60 mph before you shift. If first gear is too short, your tires spin instantly and your engine overheats. Stack gears 2 through 6 tightly so every green shift lands in the peak torque curve.
- Suspension: Set front springs and shocks to maximum stiffness, and soften the rear suspension completely. Under hard acceleration, the car squats onto the rear tires for maximum launch grip.
- Aero and Nitro: Set front downforce to 0.0 to eliminate parasitic drag, and set rear downforce around 2.5 to 3.0 to keep the car steady past 200 mph. Set nitrous for maximum flow rate (3-second duration) and fire it right as you hit second gear.
3. Drift Events
Scoring high in drift events is about maintaining a wide slide angle and good entry speed, not straight-line grip.
- Powerband: Shift your ECU and Turbo focus into the mid-range (between 2,500 and 5,500 RPM). You need wheel-spinning torque at lower speeds rather than high-RPM peak power.
- Suspension and Tires: Drop front and rear tire grip sliders down to 0 or 2. Soften your springs completely to encourage chassis roll, but keep shocks firm to control transitions.
- Aero: Zero out front and rear downforce. Downforce actively fights lateral slide and cuts into your drift score.
- The Drift Glitch Car: For absurd drift scores, build a front-wheel drive Volkswagen Golf GTI. The game calculates points based on car angle relative to track direction rather than rear-wheel wheelspin. You can toss the Golf sideways at wild angles without spinning out.
4. Street X
Street X puts you on tight, indoor stadium tracks filled with concrete barriers and hairpin turns. Top speed does not matter here, because you rarely exceed 100 mph.
- Gearing: Push your final drive to 4.40 or 4.50 for full acceleration. Short individual gear ratios let you blast out of corners instantly.
- Chassis: Push steering sensitivity to maximum (1.25). Use soft front springs, very stiff rear springs, a stiff rear sway bar, and a -0.15 brake bias. Tap the brake before the corner to rotate the rear end around the barrier without touching the wall.
Best Cars and Essential Career Uniques
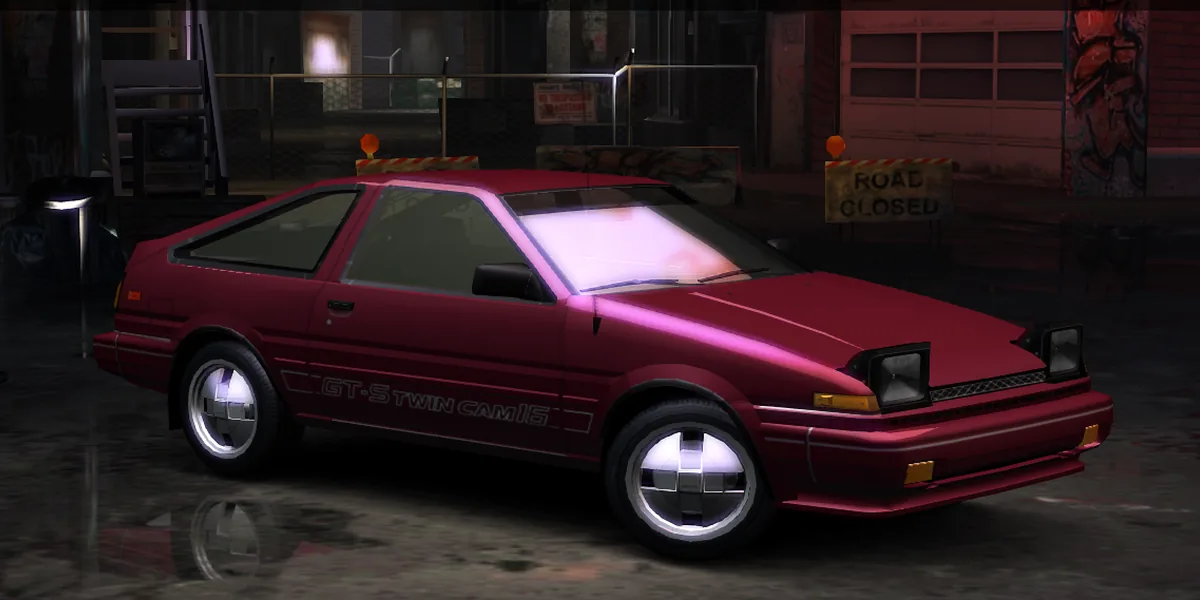
You do not need an expensive late-game car to win. The starter Toyota Corolla AE86 is arguably the best overall car in the entire game. Its lightweight body, razor-sharp steering, and high corner-exit speeds make it practically unbeatable on Circuit, URL, and Street X tracks. For pure drag racing, build a Nissan 240SX or a Mazda RX-7.
When playing career mode, make sure you beat the roaming orange street racers in Outrun mode before moving on to the next stage. Outrun events reward you with permanent Unique Performance parts that provide a flat ten percent boost above standard Level 3 gear:
- Stage 3 Outruns (3 wins): Choose the Unique Engine for a permanent bump in raw horsepower and torque.
- Stage 4 Outruns (9 wins): Choose the Unique ECU or Unique Turbo to raise your high-RPM power ceiling.
- Stage 5 Outruns (6 wins): Choose Unique Weight Reduction. Shedding vehicle weight improves acceleration, stopping distance, and cornering grip simultaneously.
Take your fully upgraded car to the dyno, adjust your powerband to the high revs, set your stance with positive rake, and flip your brake bias into the negative. You will feel the difference on your very first lap.
Then share your setup: the community tune database has the dyno builder, and the original release guide covers the career fixes and missable unlocks.